
Using labels in Confluence Cloud
Apr 30, 2023Labels are a powerful tool to organize pages, blog posts and attachments in Confluence Cloud. They are tags that help to group content which can exist in one or more Confluence spaces. For example, labels can be used to categorize content by topic, project, or priority. This makes it easy for your team find relevant content and see how different of content relates to each other.
Adding labels to a page or blog post
Labels can be added to pages or blog posts either when editing the page, or when viewing it. Keep in mind that label names must be less than 255 characters in length and cannot contain spaces or special characters (such as :, ? and @).
When viewing a page
To add a label when viewing a page, scroll down to the bottom of the page content and click the " Add label" button.
Then, start typing the name of an existing or new label. You can either choose an existing label, or click "Create new label" to create a new label with the text that you've entered.

You can also add labels to attachments by click the three dots icon in the top-right of the page, then going to "Attachments" > "Files" and adding a label to the "Labels" column of the table.
When editing a page
To add a label when editing a page, click the three dots icon in the top-right of the editor. Then select either "Add labels" or "Edit labels" (depending on whether the page already has labels).
Then, in the popup window start tying the name of a new or existing label. You can either choose an existing label, or click "Create new label" to create a new label with the text that you've entered.
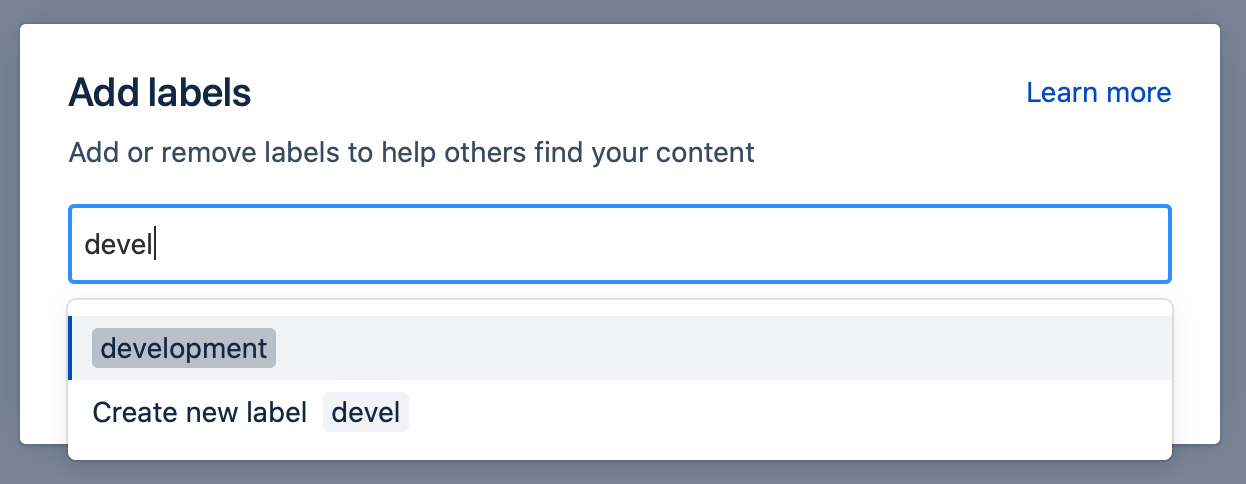
Label naming tips
When using labels to organize content, here are some tips to keep in mind to ensure that your organization has the best experience:
Keep them consistent
Ensure that users in your organization use a consistent naming scheme, which will prevent duplicate labels from being added and ensure that content is easy find.
For example, a user might add a new dev label when a development label already exists, which results in unnecessary duplication of the label. Since labels cannot be constrained to a list of allowed labels, a tool like Label Organizer for Confluence Cloud can help you merge multiple labels into a single label.
Your organization could agree on a naming scheme that governs how labels will be named. An example of conventions that might appear in the naming scheme could be:
- Use full words instead of abbreviations
- Use dashes instead of underscores when multiple words appear in the label
Regular auditing of labels to ensure they follow the naming scheme can help to ensure they are always up to date. A tool like Label Organizer for Confluence Cloud can help with this.
Use labels only when needed
It's easy to add many different labels to content, but we recommend limiting the labels added to a concise list of labels that are directly associated with the content.
Ensure labels are removed when no longer needed
To ensure that labels remain relevant to their content, ensure that they are removed if they aren't relevant. For example, if your organization has an "unpaid" label for unpaid invoices, ensure that it's then removed from that content once the invoice has been paid.
Browsing content with a given label
To view all other content with a label, simply browse to some content with that label and then click on the label. This will take you to the "Labelled content" page which lists all content that has that label.
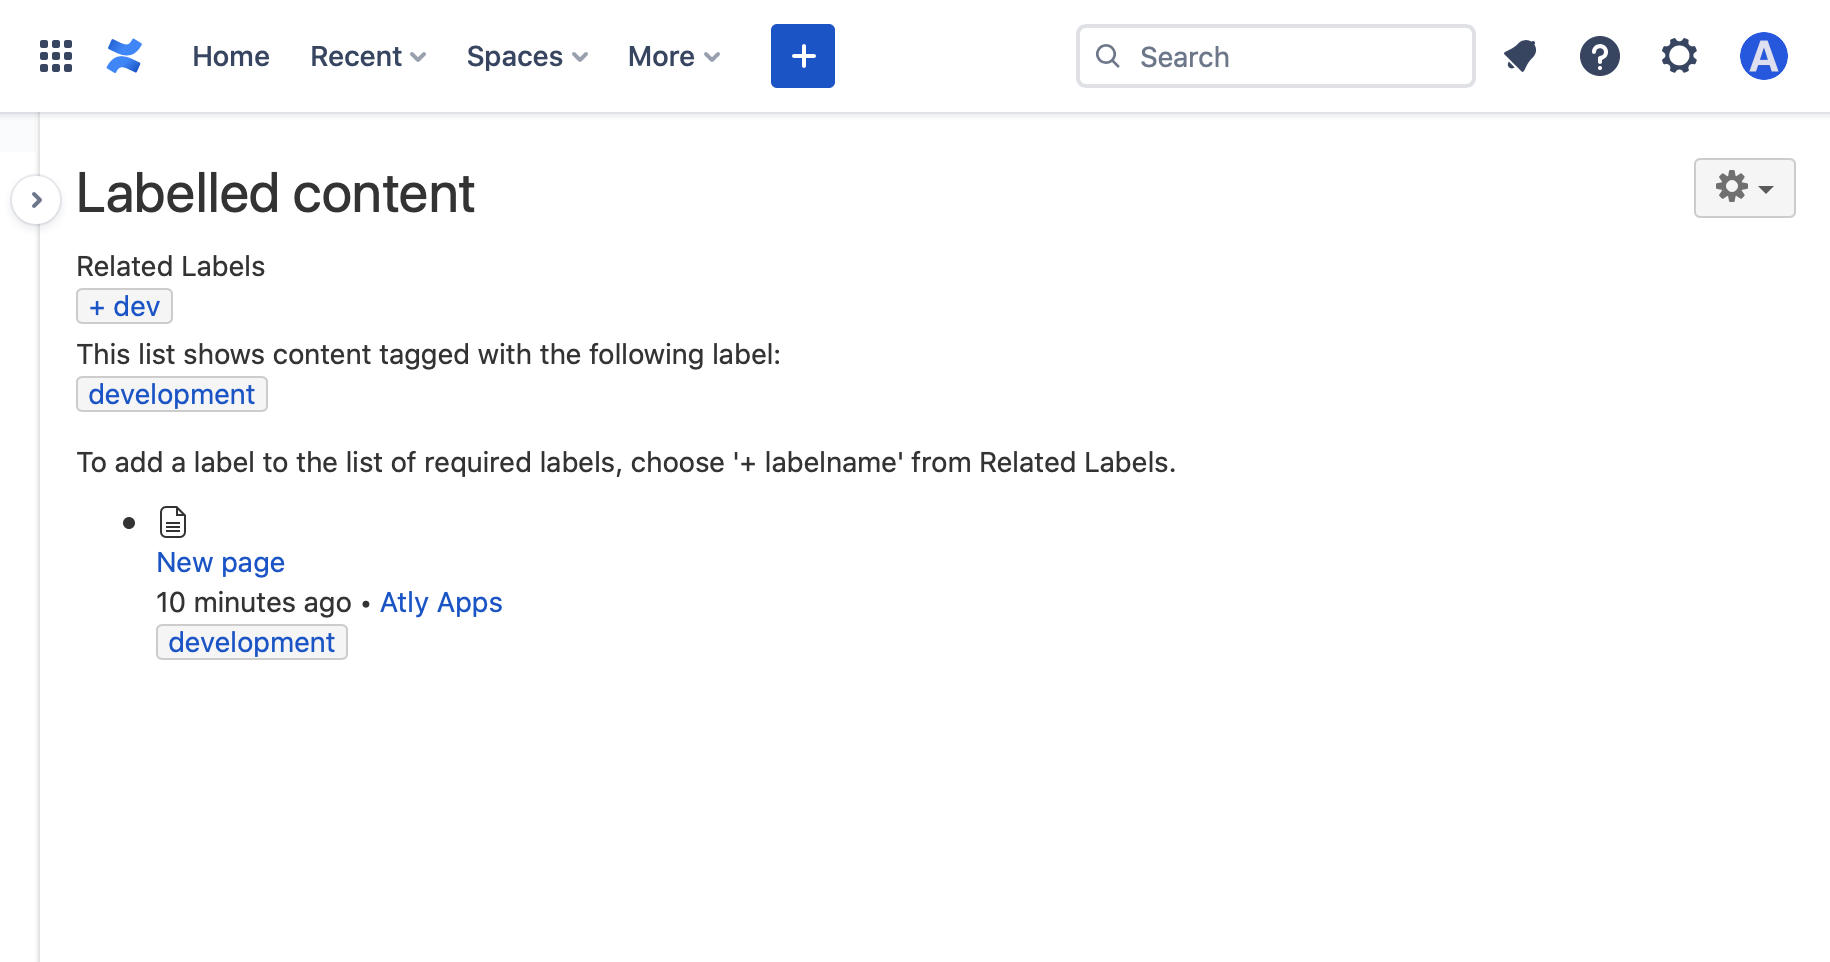
You can also view content in other spaces with the given label by clicking on the icon then selecting "See content from all spaces".
Alternatively, you can also search for content that has a specific label with "Advanced search", by clicking Search in the header and then choosing a label in the "Filter by label" dropdown on the right-hand side of the page.
Confluence Server supports searching
with the labelText: prefix in the search box, however that is
not supported on Confluence Cloud.
There are also several macros available which allow labels and labelled content to be shown.
Viewing all labels
To view all labels in a space, click on a label and then press the , then select "All Labels"
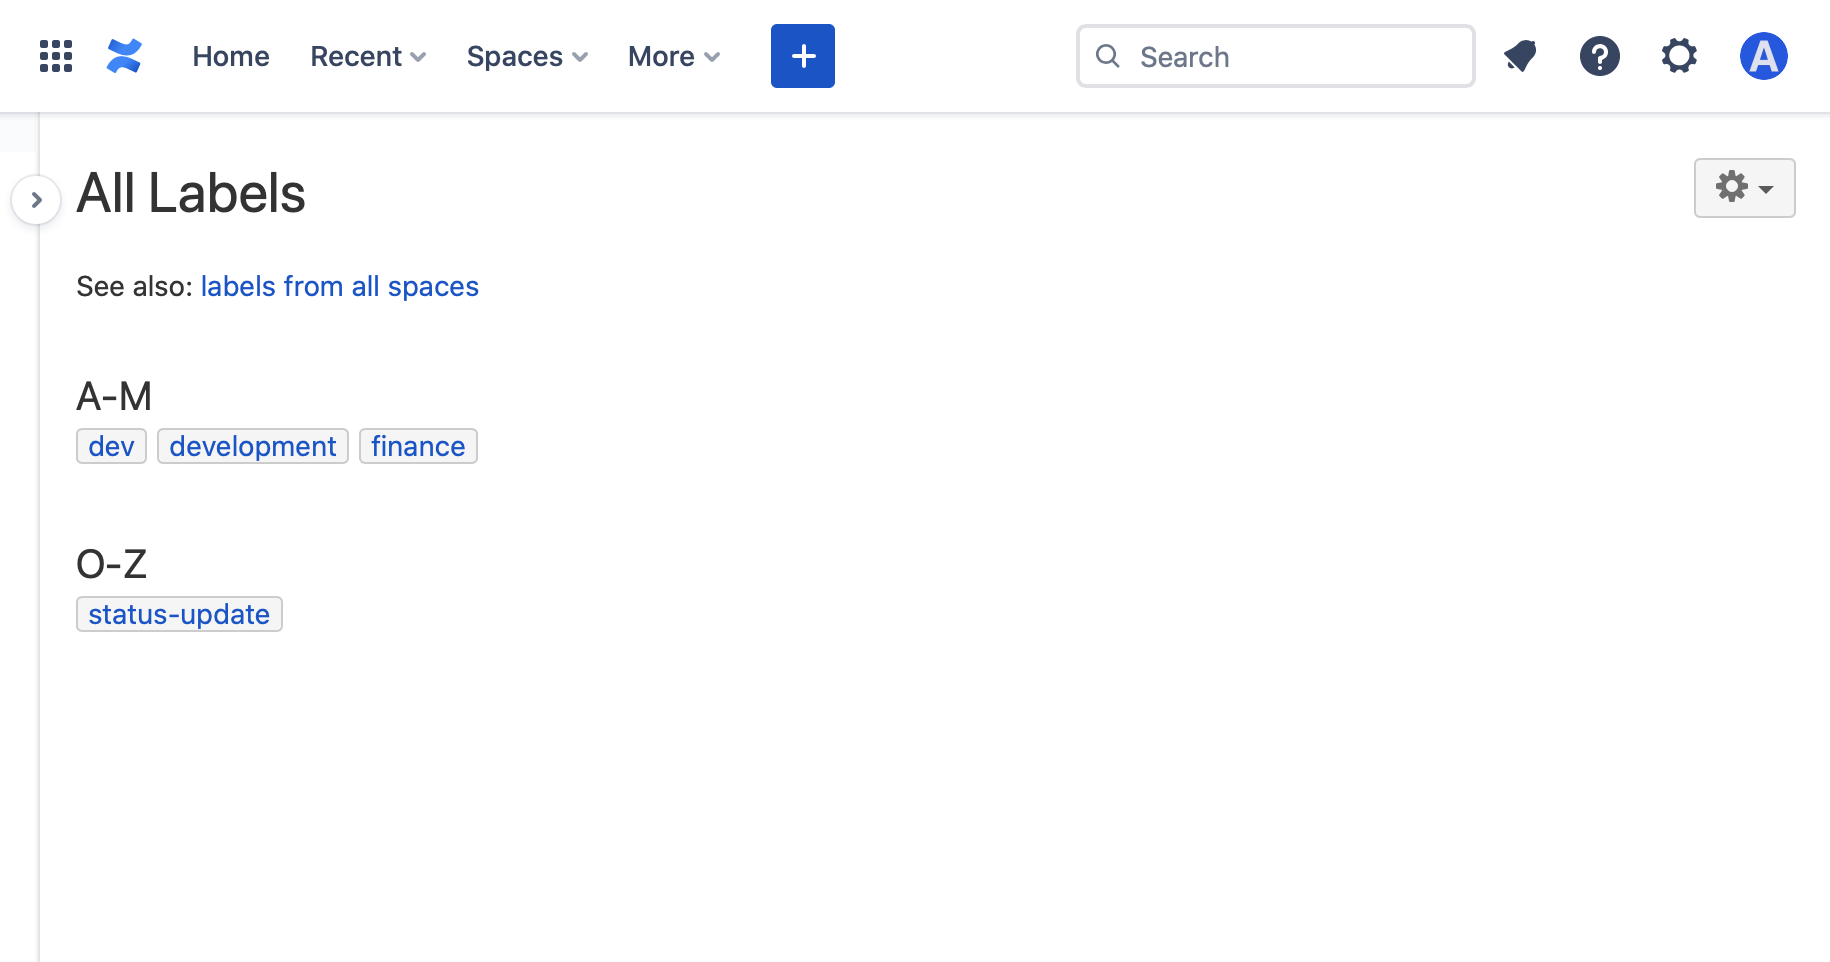
To view all labels in all spaces, you can follow the "labels from all spaces" link.
Removing Labels
After adding labels to content, they can also be removed:
When viewing a page
To remove a label when viewing a page, scroll down to the bottom of the page content and click the button next to the label to be removed.

When editing a page
To remove a label when editing a page, click the three dots icon in the top-right of the editor. Then select "Edit labels" and click the button next to a label to be removed.
Deleting a label
Labels can be deleted by removing the label from all content that the label appears on.
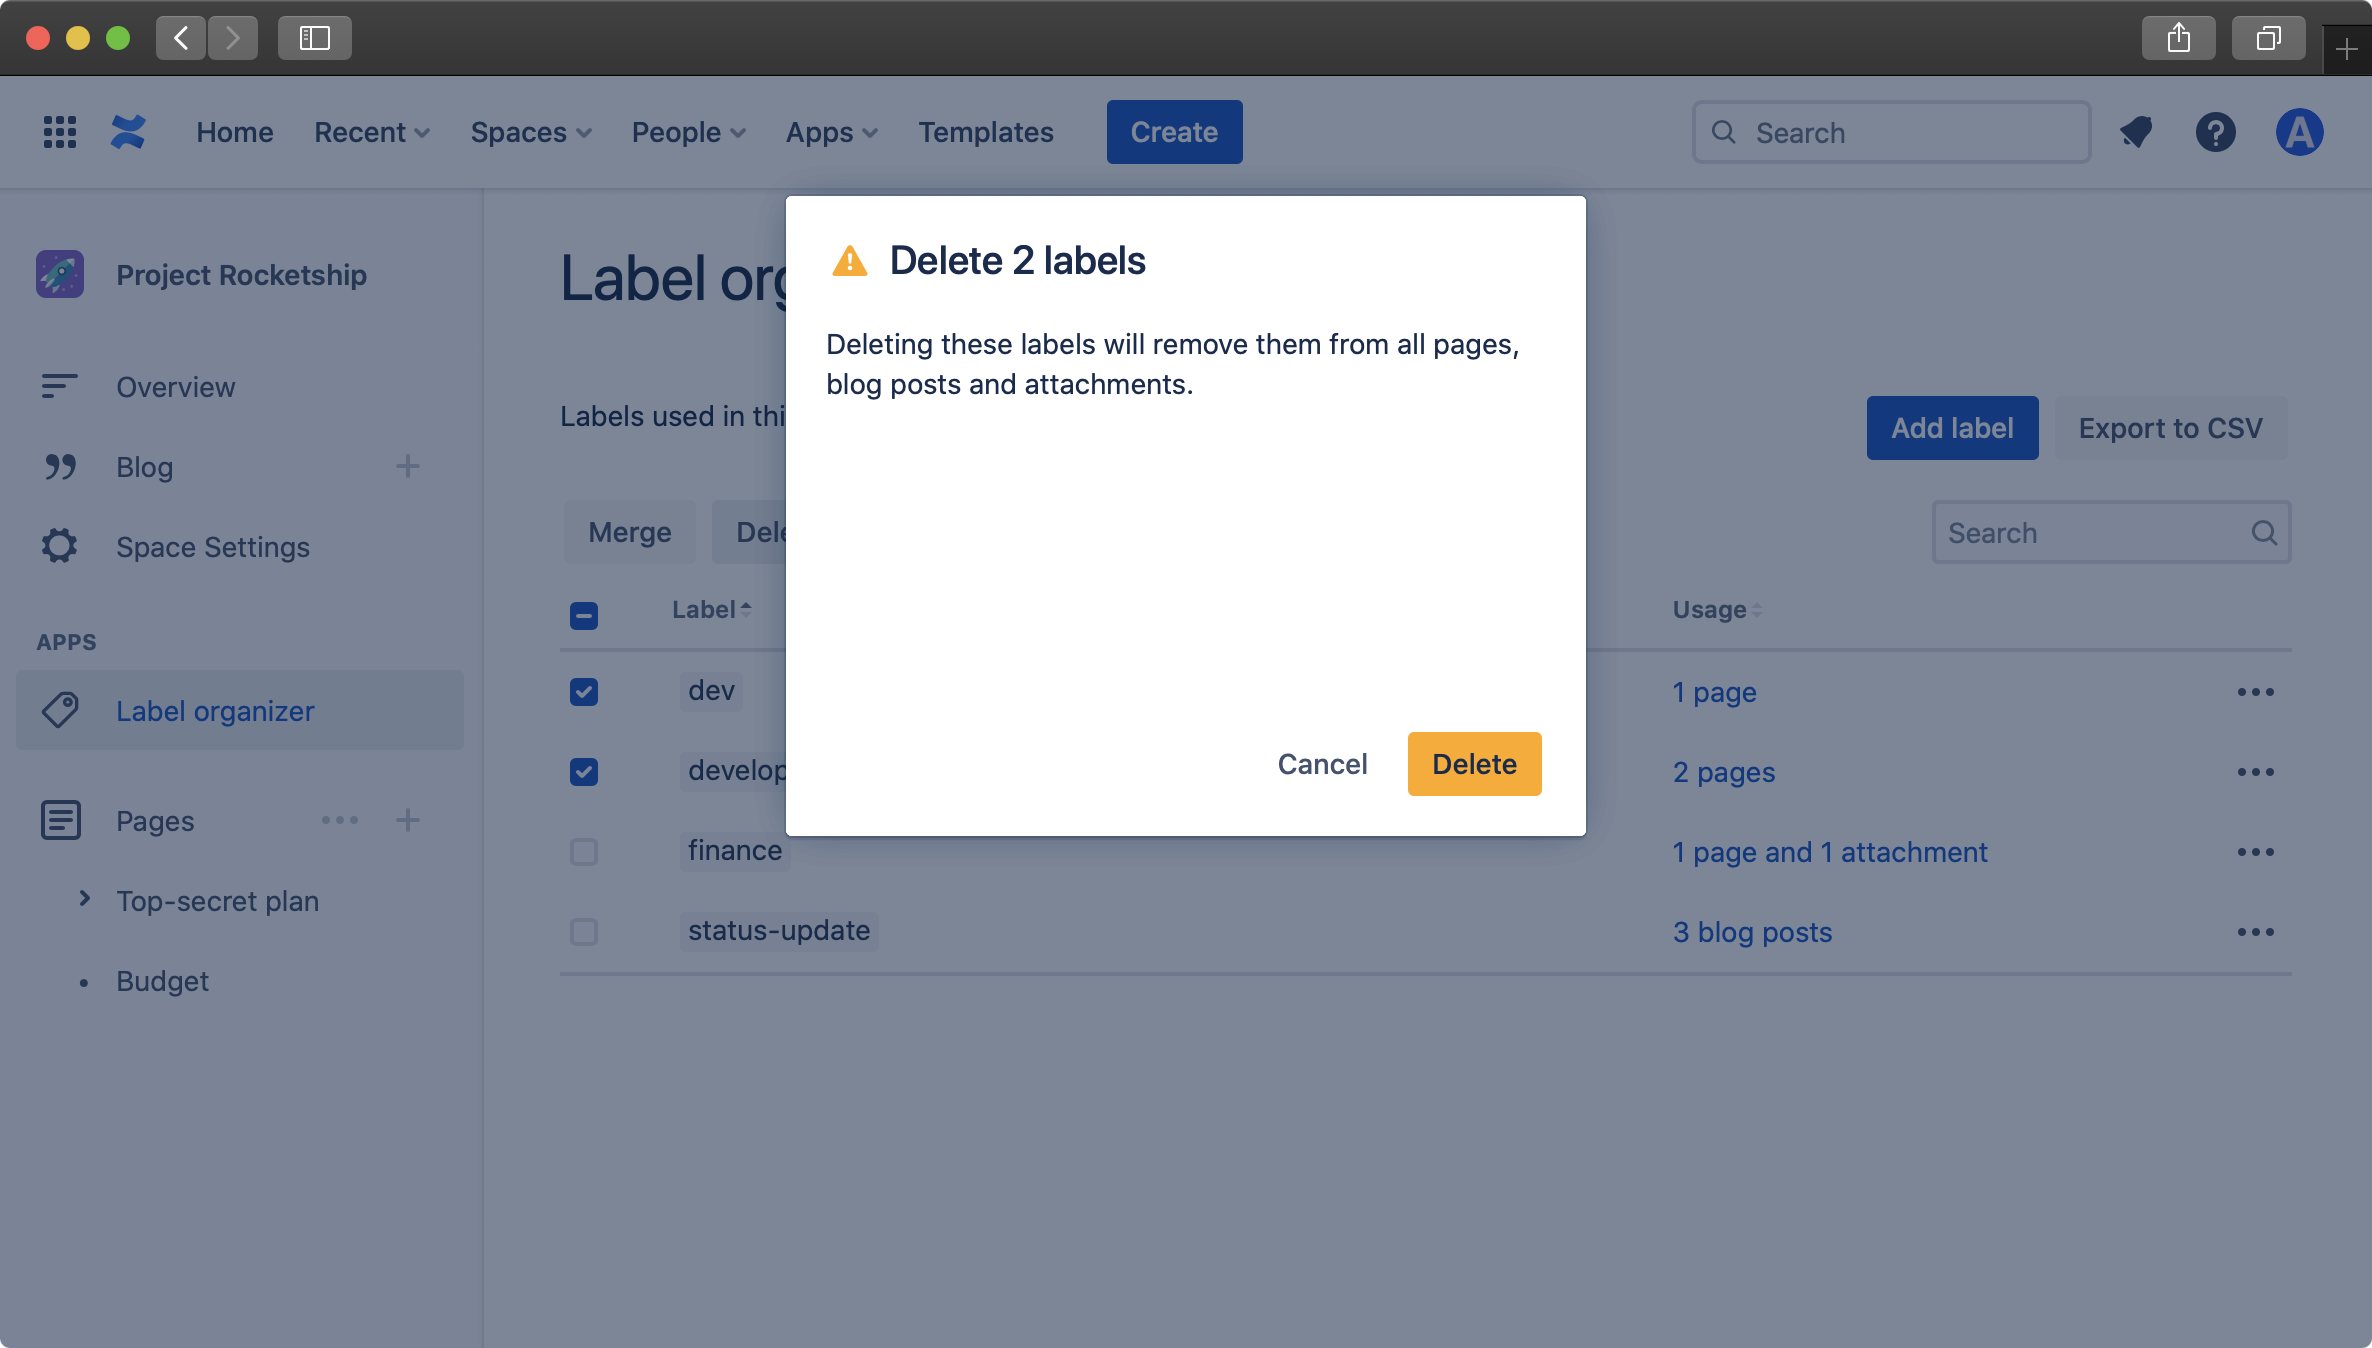
This can be done manually in the user interface, or can be done in bulk by using the Confluence API or a third-party app like Label Organizer for Confluence Cloud.
Bulk adding, removing and merging labels
Performing bulk changes to labels isn't supported natively in the Confluence Cloud user interface, but Label Organizer for Confluence Cloud supports organizing labels directly inside Confluence.
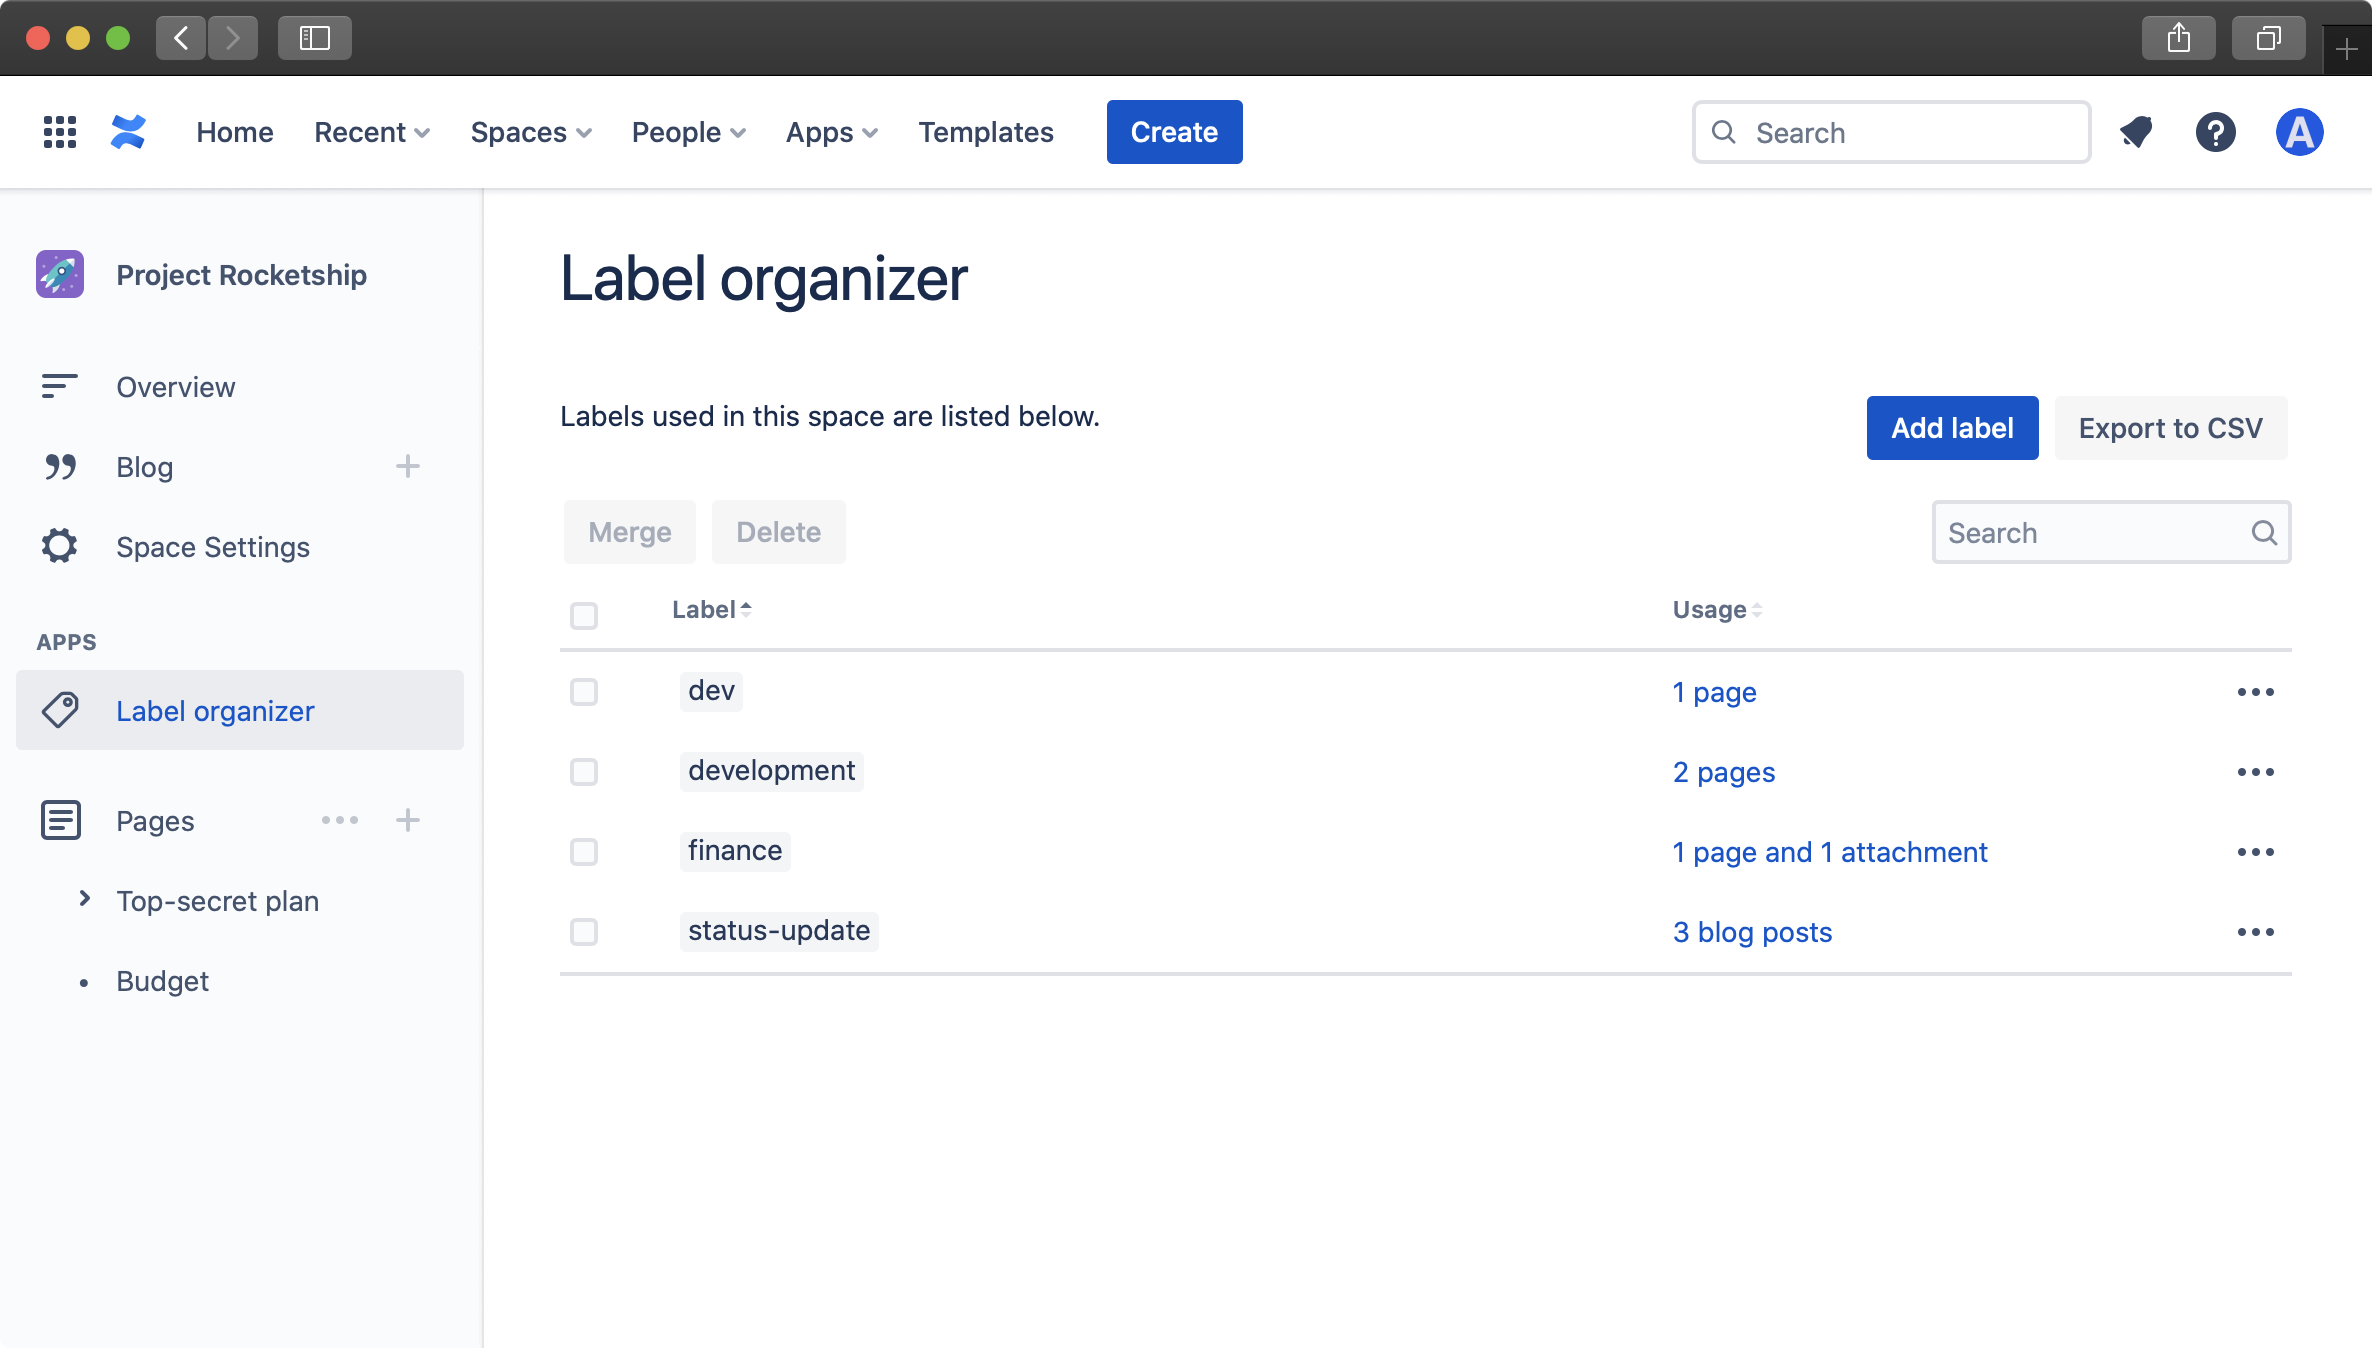
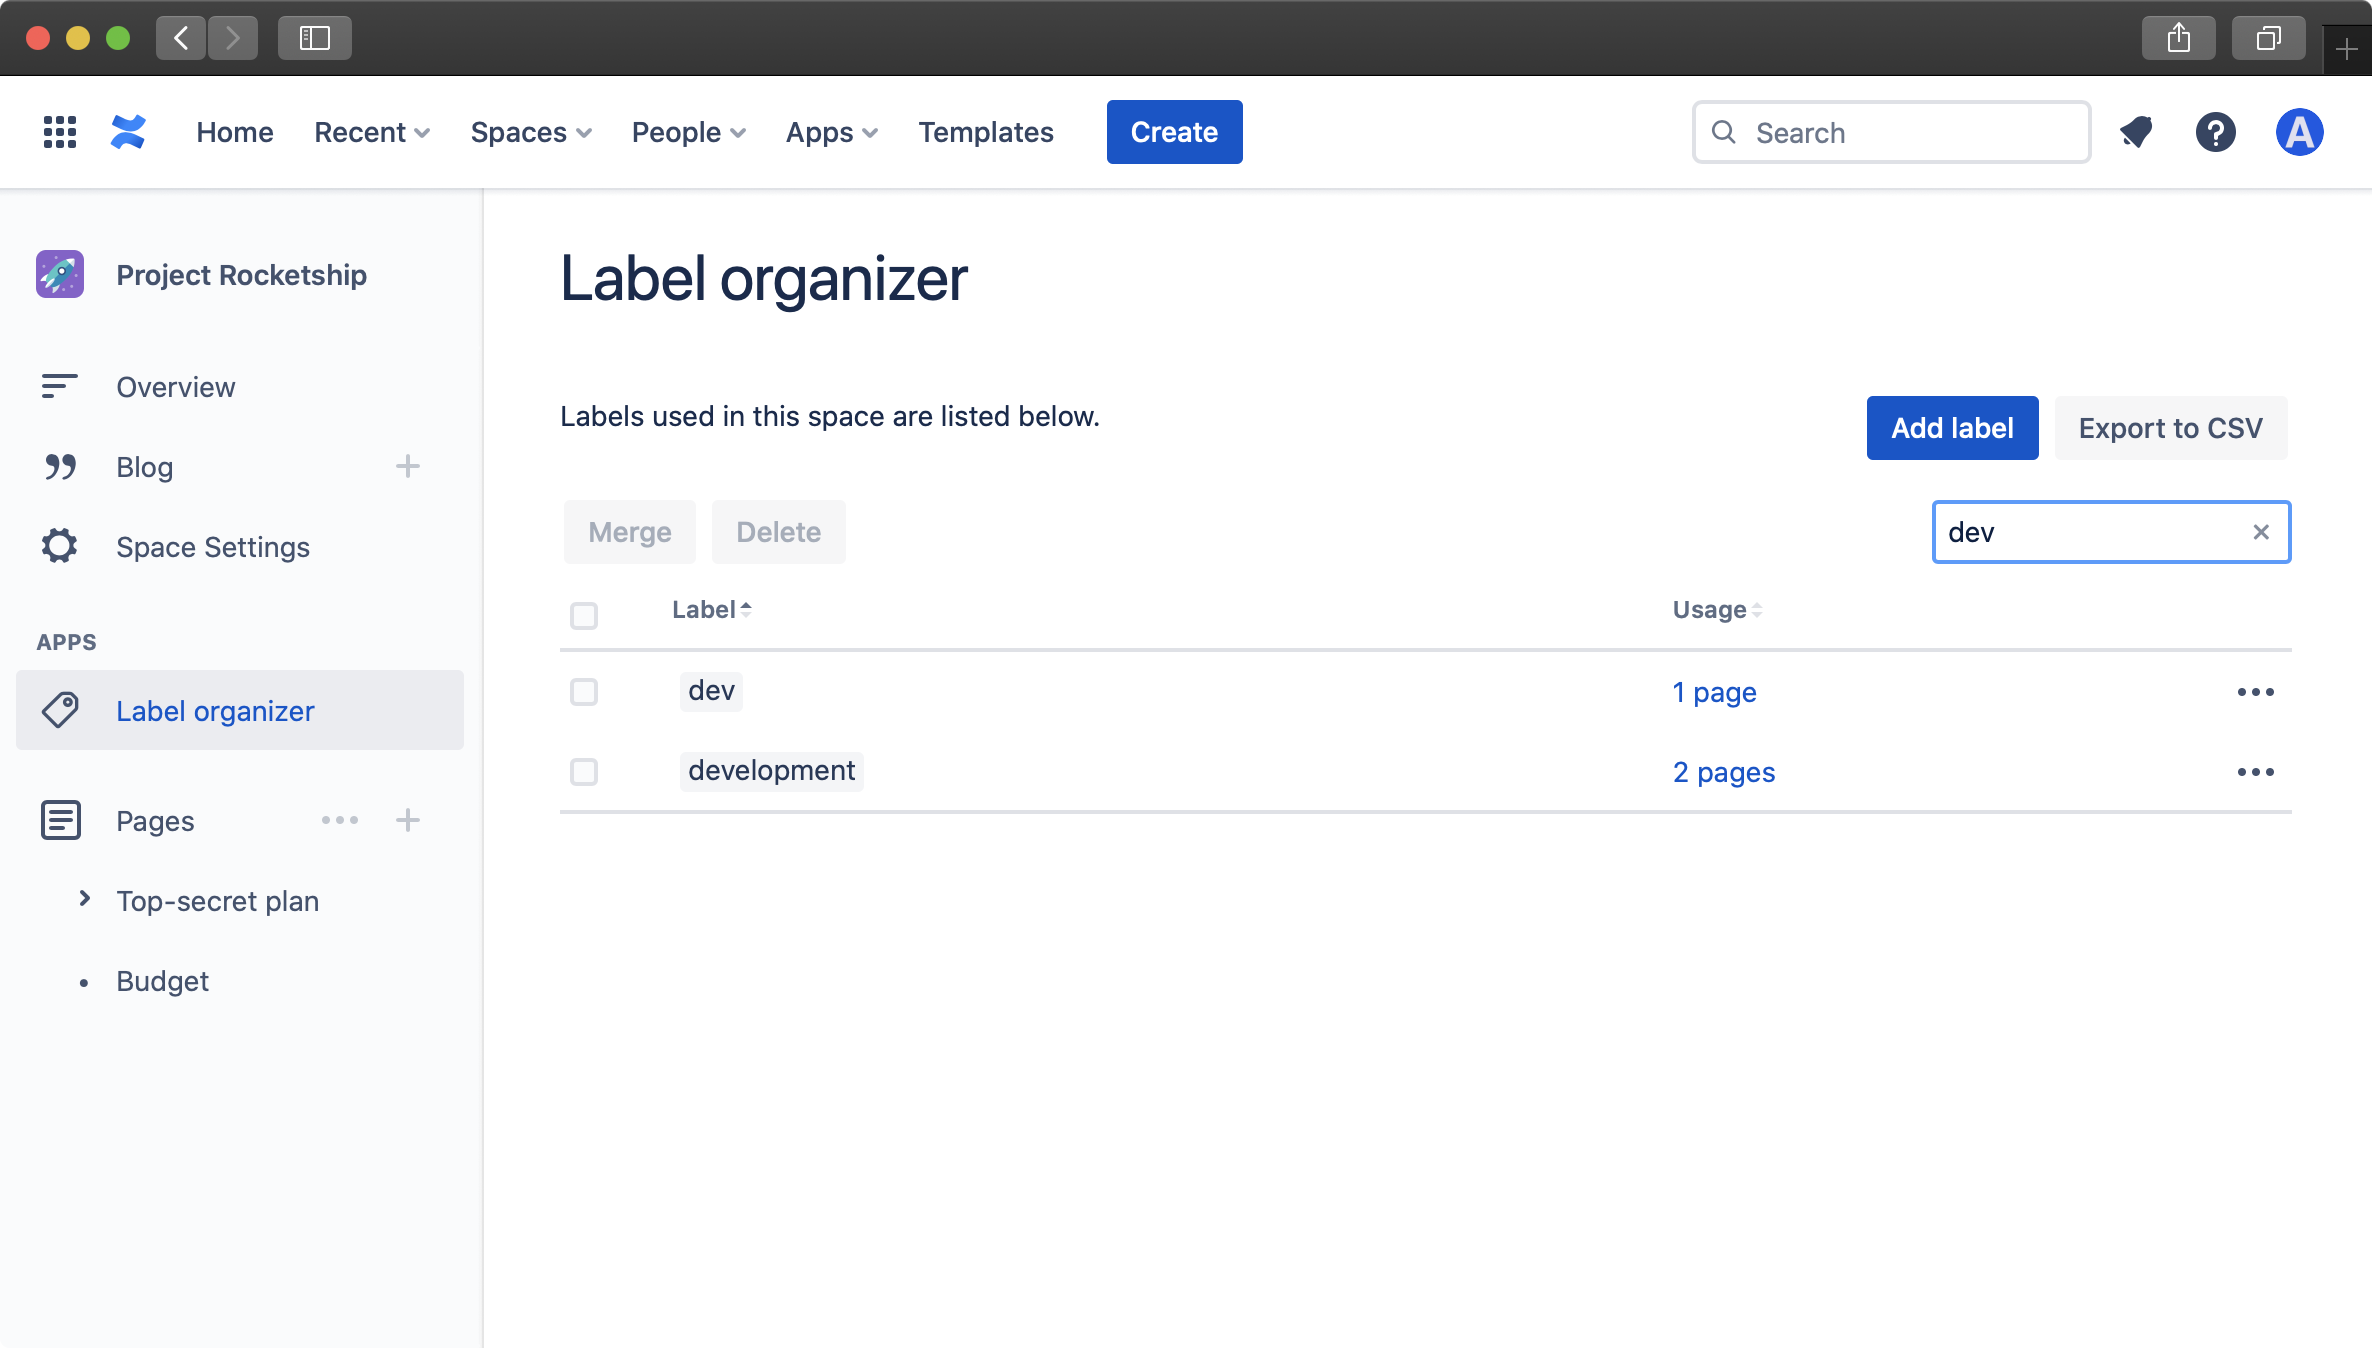
It includes the ability to list all labels in a given Confluence space, or entire Confluence instance, where labels can then be renamed, merged or deleted:

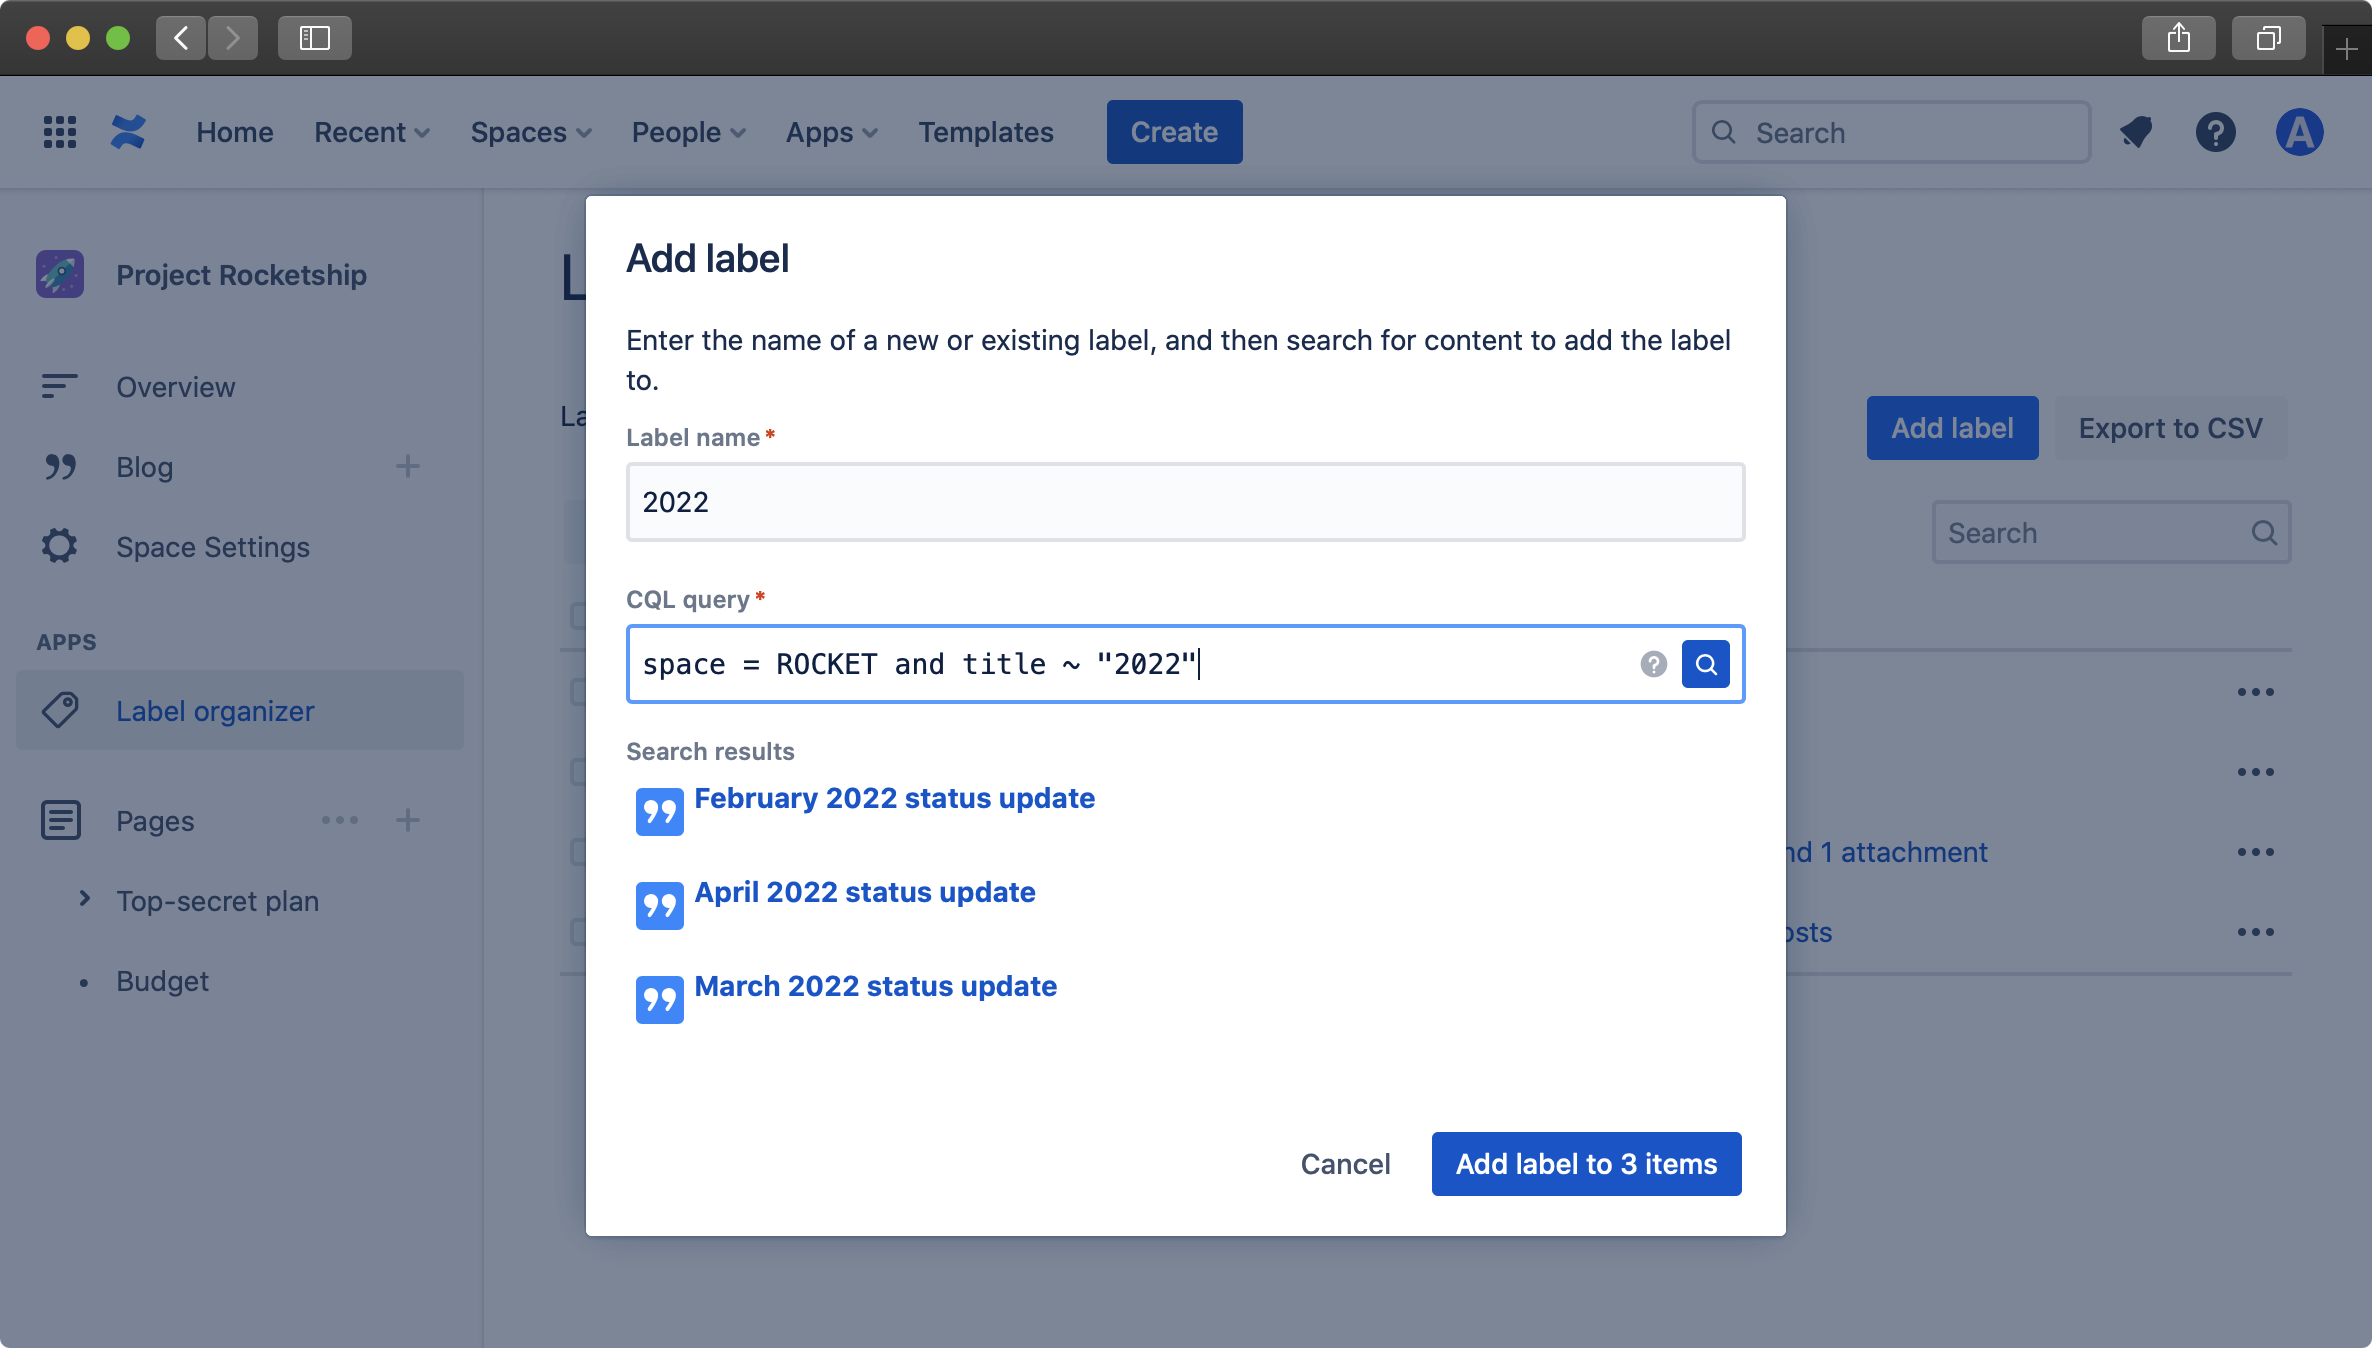
Furthermore, labels can be added in bulk to pages and blog posts that match a CQL query:
More information and pricing details can be found in the Atlassian Marketplace (free for Confluence instances with 10 users or less!).
Conclusion
Creating and editing labels in Confluence is a simple and straightforward process that can help you organize and categorize your content. By keeping in mind the best practices mentioned above, you can ensure that your labels are being used effectively, making it easier to find and access the information you need. Whilst the features included in Confluence allow you to create and edit labels, apps such as Label Organizer for Confluence Cloud can help to improve the management of a large number of labels and help your organization have a better experience.

